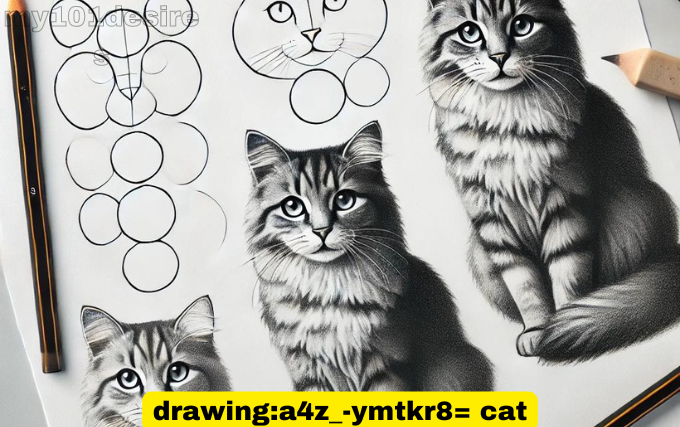
Drawing a cat can be both fun and challenging, especially for beginners. This guide will help you create a beautiful cat drawing on an A4 sheet with simple steps and easy-to-follow instructions.
Have you ever looked at a cute cat and wished you could capture its likeness on paper? Drawing animals, especially cats, requires a bit of practice and patience. In this article, we will walk you through the process of drawing a cat from start to finish. Whether you are a novice or someone looking to improve your drawing skills, this guide will provide you with the tips and techniques you need to create a realistic and charming cat drawing.
Gathering Your Supplies
Before you begin, make sure you have all the necessary materials. Here’s a list of what you’ll need:
- A4 paper
- Pencils (HB, 2B, 4B)
- Eraser
- Sharpener
- Ruler (optional)
- Blending stump or cotton swabs
Setting Up Your Workspace
A comfortable and well-lit workspace will make a big difference in your drawing experience. Ensure your area is free from distractions and has adequate lighting to see the details of your drawing clearly.
Basic Sketching Techniques
Understanding Basic Shapes
Start by observing the basic shapes that make up a cat’s body. Most cats can be broken down into simple shapes like circles, ovals, and triangles. This foundational step will help you get the proportions right.
- Head: Draw a circle for the head.
- Body: Add an oval shape slightly overlapping the circle for the body.
- Ears: Draw two triangles on top of the circle for the ears.
- Limbs: Sketch out the legs and tail using elongated ovals and lines.
Outlining the Cat’s Body
Once you have the basic shapes, connect them to form the outline of the cat’s body. Pay attention to the natural curves and contours. Use light strokes so you can easily erase and make adjustments.
Adding Details to Your Cat Drawing
Drawing the Face
The face is the most expressive part of your cat drawing. Follow these steps to capture the essence of your cat’s face:
- Eyes: Draw two large almond-shaped eyes. Place them symmetrically on either side of the head circle.
- Nose: Add a small triangle between the eyes for the nose.
- Mouth: Draw a line down from the nose and curve it into two small lines to form the mouth.
- Whiskers: Add long, thin lines extending from the cheeks.
Refining the Body
Now, refine the body by adding more details to the limbs and tail. Make the lines more defined and start erasing any unnecessary sketch marks. Focus on the muscle structure and the way the fur flows.drawing:a4z_-ymtkr8= cat
Drawing the Fur
Drawing fur can be tricky, but with practice, you can make it look realistic. Use short, quick strokes to mimic the texture of fur. Pay attention to the direction of the fur and how it follows the contours of the cat’s body.
Shading and Final Touches
Adding Depth with Shading
Shading brings your drawing to life by adding depth and dimension. Use a softer pencil (like 4B) to add shadows to areas that are less exposed to light. Blend the shading with a blending stump or cotton swab to create smooth transitions.drawing:a4z_-ymtkr8= cat
Highlighting
Add highlights to areas where light hits the cat’s body. This can be done by lightly erasing parts of the shaded areas or by leaving those areas untouched while shading around them.
Final Adjustments
Step back and look at your drawing from a distance. Make any final adjustments to ensure proportions and details are accurate. This is your chance to refine any areas that may look off.
Conclusion
Drawing a cat may seem challenging at first, but with practice and patience, you can create a beautiful and realistic representation. Follow these steps, and don’t be afraid to make mistakes along the way. Each drawing is a learning experience that will help you improve your skills. So, grab your pencils and start drawing your purr-fect cat today!
